


Creating a WYSIWYG Editor for My Website
A rich text editor with contenteditable and the JavaScript Selection and Range Classes
02.06.2023 - 11:44When I learned web development, JavaScript wasn't nearly as powerful as it is today and most text formatting was done with BB-Codes. Later on, I discovered the contenteditable HTML attribute, which allows the user to edit the contents of the HTML tag. Contenteditable is typically used with the execCommand function which can be used to dynamically format the selected text. The execCommand function is not only very simple to use with most formatting options only requiring a single line of code, but also extremely powerful and supported by every browser. There shouldn't be any reason not to use it and I have used it for various projects in the past.
However, when you open the execCommand documentation page, you are immediately greeted by a big red box telling you that this function is deprecated. It's still supported by all browsers and it's very unlikely to be removed any time soon because so many websites use it. The browser developers probably know this and won't break large parts of the internet, so I could have used it to update my website's editor too.
Still, using a deprecated function always feels bad and risky. Instead, I wanted to learn how to do it properly. After some research, I found out that the Selection and Range classes are meant to be used for modern text formatting. However, they are a lot more complicated and unintuitive to use compared to execCommand.
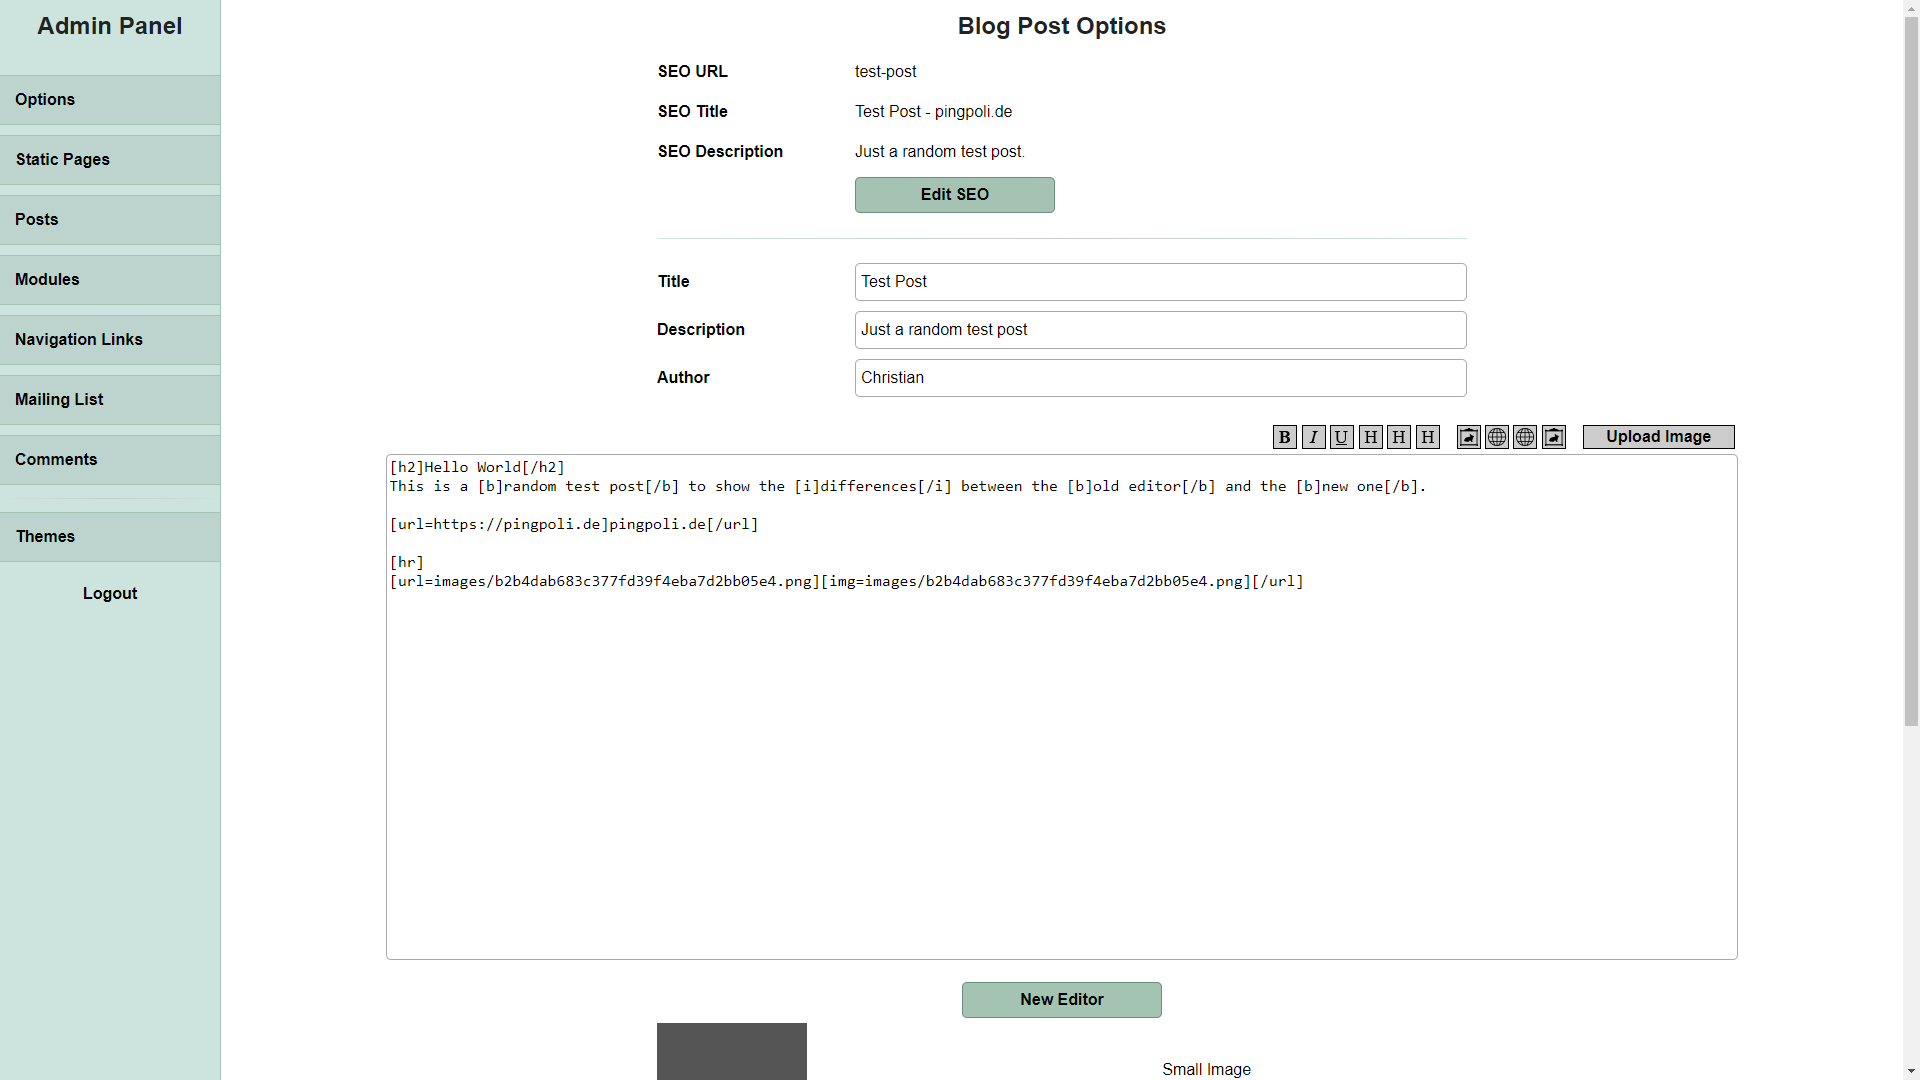
The old BB-code editor:
Basic Formatting
I started with the most basic formatting options: bold and italic. For both of these, the selection has to be surrounded with a simple HTML tag without any additional attributes like <b></b> or <i></i>. However, I have also learned that the <b> and <i> tags aren't used anymore, and you are supposed to use <strong> and <em> instead. The basic usage for simple tags like this is:
var selection = window.getSelection();

var range = selection.getRangeAt( 0 );

var newNode = document.createElement( "STRONG" );

newNode.appendChild( range.extractContents() );

range.insertNode( newNode );
This will take the selection and surround it with a <strong> tag. What's a bit more complicated is removing a <strong> tag again. For this, we have to figure out whether the selection is within a tag of the given type and then remove that node from the DOM. This can be done with range.startContainer and range.endContainer and traversing the DOM until we get to the contenteditable div container. Only checking the direct parent isn't enough because the searched node type could be nested in other nodes of a different type like if we were looking for <strong> in this example: "some <strong><em><u>nested</u></em></strong> text".
#isInside( node , nodeName )

{

  if ( node === this.div ) return false;

  if ( node === document.body ) return false;


  if ( node.parentElement.nodeName === nodeName )

  {

    return node.parentElement;

  }

  else

  {

    return this.#isInside( node.parentElement , nodeName );

  }

}

const startContainerNode = this.#isInside( range.startContainer , "STRONG" );

const endContainerNode = this.#isInside( range.endContainer , "STRONG" );
However, when deleting the node, we cannot remove it immediately. When deleting an HTML node, all children are removed too and we would like to keep the text that was bold before and only delete the formatting. For this, we have to move all children of the node one layer up before deleting it:
#removeNode( node )

{

let parent = node.parentElement;

for ( let j = 0 ; j < parent.childNodes.length ; ++j )

{

if ( parent.childNodes[j] === node )

{

while ( node.childNodes[j].length > 0 )

{

parent.insertBefore( node.firstChild , node );

}

parent.removeChild( node );

return;

}

}

}

this.#removeNode( startContainerNode );
This is the basic pattern for the simple formatting options. However, this code mostly assumes that the user cleanly selects the text he wants to format. There are many different ways text could be selected. For example, selecting half of the bold text and the rest is non-bold text, or starting in one bold part, going through some non-bold words, and finishing in a different bold section. It's not possible to go through all permutations of possible selections and tag orders, and I am fairly certain that I have missed some myself. There are a lot of different ways you can handle this, it depends on how you want your editor to behave.
For mine, I have gone with a conservative approach. When a selection doesn't fall within certain conditions, I'm simply removing the formatting. This might require the user to select something again to format it in the way he expected, but for a simple project, this seemed like the best solution.
The overlay of the new editor:
Besides just bold and italic, this method works for all simple tags that only surround the selection like headings, underlines, strokes, sub and superscripts, and more.
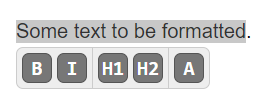
The new editor, much cleaner than the old one and you can instantly see all changes:
Links
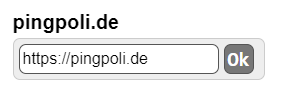
After the simplest case of just empty tags, links are the first formatting option that requires some additional work, because the <a> tag needs an href attribute so our link actually goes somewhere. Luckily, this didn't require a lot of changes to the formatting code besides adding the href attribute to the element when it is created. Instead, most of the differences were in the overlayed UI. When the user clicks the link formatting button, the interface changes to a big input field where the URL can be copied into and an ok button to confirm it.
The link interface:
Empty Lines
So far, all formatting options were for text. However, other HTML elements stand on their own. The most popular example of this is images, which only need an <img> tag and no </img> tag. Adding elements like this isn't much more complicated than text-based ones. However, there is no obvious solution for displaying the UI to insert these types of elements. There could be a button above or below the editor, but when the text gets long, this requires scrolling to get to and isn't convenient. Instead, I took some inspiration from the Medium editor, which shows the interface when the caret is in an empty line.
Trying to figure out whether the caret is in an empty line and where on the screen that is turned out to be quite tricky. For the normal overlay that is shown when text is selected, I'm using the range.getBoundingClientRect(); method which returns the bounding box of the selection. However, when the selection is only the caret, this method always returns 0,0. In my opinion, this is a bug or at least an oversight in the Range API. Clearly, the browser knows where the caret is because it renders a blinking short line at that position. So why is it not possible for the range.getBoundingClientRect(); method to return that position?
Because of this bug, I had to do a very weird workaround that includes this nasty line of code, which checks whether the innerHTML text of the editor before and after the caret contains line-breakable elements:
if ( ( this.div.innerHTML.indexOf( "<br>" , caretPosition-4 ) === caretPosition-4 || this.div.innerHTML.indexOf( "<div>" , caretPosition-5 || this.div.innerHTML.indexOf( "<hr>" , caretPosition-4 ) === caretPosition-4 ) === caretPosition-5 ) && this.div.innerHTML.indexOf( "<br>" , caretPosition ) === caretPosition )With this, I know whether the click was in an empty line and can show the appropriate UI at the position of the mouse. It's not as clean as showing it at the screen position of the caret, but I couldn't find a good solution to do that.
The empty line interface:
Images
Adding the images to the DOM is fairly straightforward:
img( url )

{

var selection = window.getSelection();

var range = selection.getRangeAt( 0 );

if ( selection.type === "Caret" )

{

var linkNode = document.createElement( "A" );

linkNode.href = url;

linkNode.target = "_blank";

var imgNode = document.createElement( "IMG" );

imgNode.src = url;

linkNode.appendChild( imgNode );

range.insertNode( linkNode );

}

}
The difficulty with images is the integration into websites because the image has to be uploaded to the server before it can be included. This always depends on the backend solution and there is no general solution that could be included in the editor. The editor goes so far that when the image button is clicked, a new hidden file input is created and triggered. When the user selects an image, an onImageUpload( fileInput ) callback is called, which can be used to implement the image upload. Once the image upload is complete, the image can be inserted with the function above. Because my website's CMS already had a function for image uploading, the integration of the new editor was fairly painless.
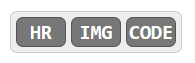
Code
The final formatting option I added (when I started to write this blog post and realized that I wanted to include code examples), was <code> blocks. Conceptually, they are similar to other elements so I was able to add them quickly. However, when pressing Enter within them, Chrome always split the code blocks into one per line, which looked very bad. I had dealt with this problem previously because Chrome also always encapsulated every new line break in a <div> container. I fixed it by just removing all occurrences of <div> and </div> because I wasn't using them for anything else. However, this didn't work for the code blocks and it was a very hacky solution anyway. I tried a few more ways to solve the problem and after a while, I stumbled upon an easy, but good solution online: When changing the CSS display of the contenteditable div (and the code blocks) from block to inline-block, Chrome doesn't do the weird line breaking anymore and everything works.
Integration
Integrating the new editor into my website wasn't very difficult. I even managed to make it almost completely compatible with the old BB-code editor so the same blog post can be edited with either editor. I'm pretty sure there are some details and edge cases I have missed, but I will fix them when I find them.
Missing Features
So far, I have only implemented the most fundamental features of the editor, but of course, there is still a lot more that could be done:
- Dynamic saving: The text should be saved every few minutes or when no keystroke has been detected for a few seconds, so it doesn't get lost when the tab is closed, the PC crashes, etc.
- Versioning: Saving either incremental or full versions of the text in local storage so it's possible to go back to a previous version when something is changed by mistake
- More formatting options like lists and youtube videos
After using the editor to edit this story, I have found a few more problems:
- Multiple spaces or tabs in code blocks are deleted, so code looks horrible at the moment
- When formatting something the page scrolls back to the top, which is quite annoying
- [ i ] within code blocks gets converted to italic BB-codes when saving with the old editor
- Sometimes the editor creates some weird <span> tags with a lot of CSS formatting for no apparent reason
Compared to execCommand, the new system with Selection and Range is a lot more complicated and not very intuitive. I haven't fully understood its capabilities yet and don't know the best ways to use it, but at least the editor seems to mostly work at the moment. It's one of those projects that you work on every now and then when a problem starts to bother you or you need a new feature. I'm also not fully convinced all Selection and Range features are correctly supported by all browsers, so it might get easier over time to implement a rich text editor like this.
Resources
Here is the full source code of the editor in its current state. It still has some problems, but if you want to use it as a starting point for your own projects, feel free.
by Christian - 02.06.2023 - 11:44