


GameDev 52: Viking Map
Creating a new viking themed map using my editor
28.05.2020 - 18:00I am currently working on a game that requires a couple of different maps to play on. For interest's sake I want to have different map themes with a few maps of each theme. At the moment there are four themes: Lush Mesa, Tropical Island, Desert and now Vikings. Having different themes doesn't really matter for the gameplay itself, but it makes it more interesting and replayable for the player and also more fun for me to work on the maps. Lately I have really been enjoying making low poly models in Blender and having to create more models for different themes is a nice excuse and motivation to make more models.
While I would love to place every single tree and rock on the map myself, it's not really feasible, because it would take forever. However, I have created my own editor, where I have a few tools to help me make a better map more efficiently. I am still adding new features to the editor, but even in it's current state it's very useful for creating my game maps.
Creating the map
The first aspect of every new map is the terrain. Currently I have an extra program to create heightmaps which I can then import into my editor, but I am going to integrate the heightmap creation directly into the editor for ease of use. Once I have a starting terrain from the heightmap it's time to create the areas for the players. I went with a simple 30x30 square for this map, but they can be bigger or differently shaped as well. Then I like to smooth out the edges of the player areas and fix other little issues in the heightmap or even rough up some areas to get more rugged terrain or a more rugged coastline. After that there are two steps, which are important for the gameplay: marking which tiles are obstructed and assigning the tiles to their respective players. Even though I am only using the editor for one game at the moment, I always had the goal in mind to be able to use it for other types of games as well, so I have a very general numeric layer concept, which I am using for player tile allocation in this case, but it could be used for all kinds of other features too.
Next comes the ground texturing, which is very simple in my editor. I always compare it to survival minecraft building, where you build a shape out of a single block type and then go back and replace a lot of the blocks with other block types to get a more interesting look. Unlike in minecraft, where you have to replace every single block by hand, my editor has a feature to randomly place the textures with a certain chance. It only takes a couple of passes with different tiles and different chances to get a decent base look for the ground. After that I sprinkle a few more highlight textures to some areas of the map by hand, in this case some leftover snow on the highest elevations of the map.
Looking from the harbor area towards the village and the stave church:
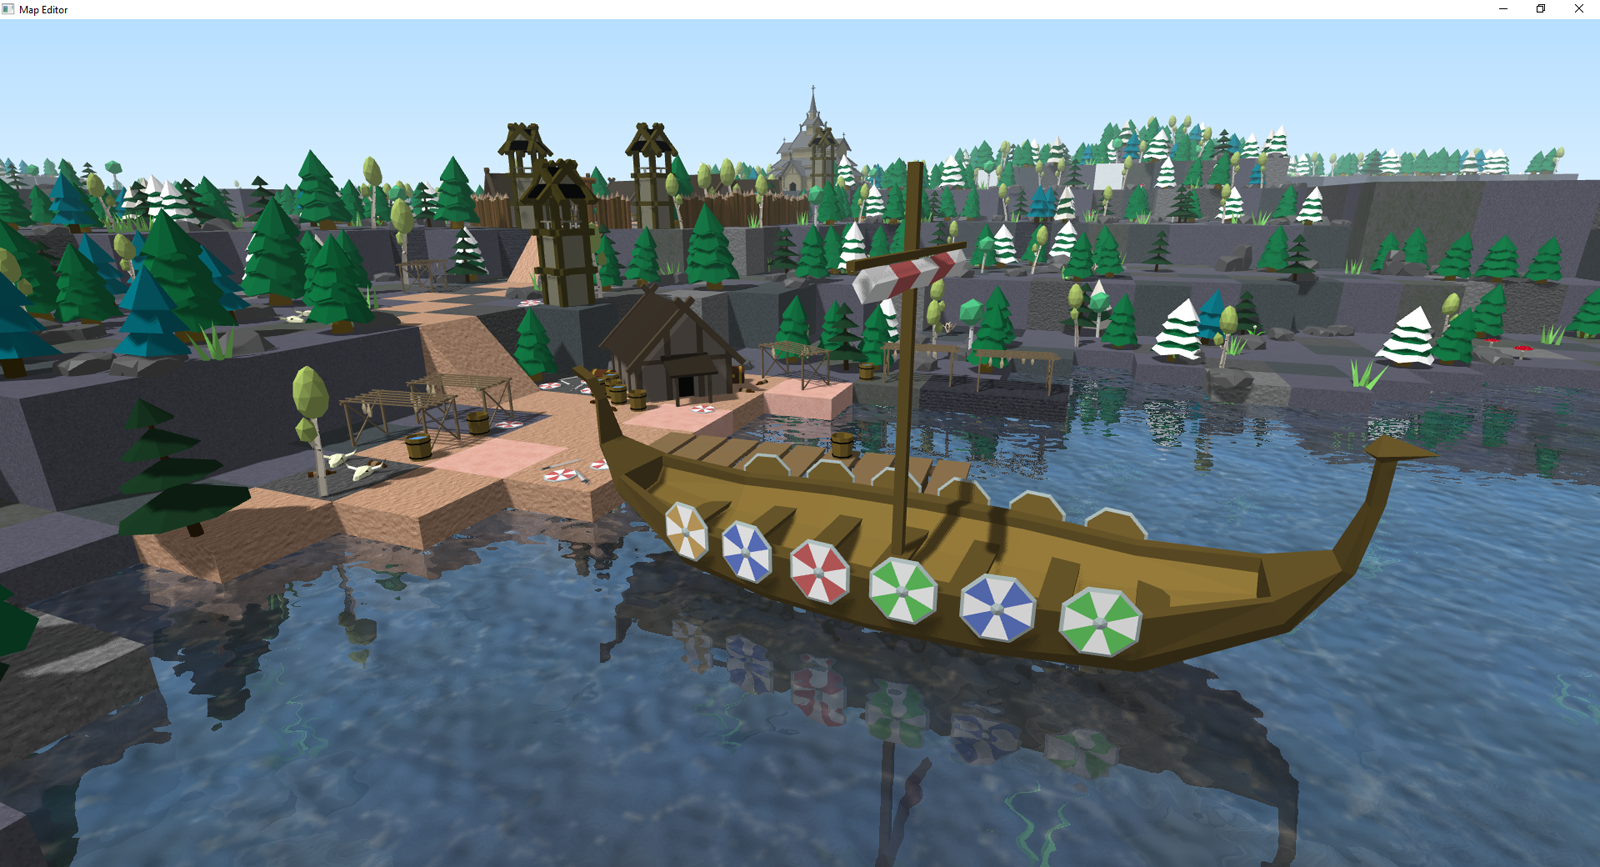
The last major step when creating a map is placing the models. This is generally the most fun, but also the most time consuming task. I used the new noise based placement system to create a loose forest cover for most of the map like you would see in northern skandinavia. Then I used the normal mass placement script to spread a lot of rocks and other smaller plants and mushrooms everywhere. With the natural scenery in place it was time to create a little viking village with a stave church on a hill and a harbor area for viking ships. I had created quite a few smaller models for the viking theme, which I could scatter all over the settled area. It's these smaller details that make a scene look realistic and lived in, because humans are very messy and leave random junk everywhere. Without these details everything tends to feel very sterile.
I actually went back and forth with the lighting of the map. Originally I wanted to have a grey, gloomy and overcast atmosphere, but when I created the camera paths for the video it just didn't feel right. The other maps in the game are very bright and colorful, and a lot of the models I was using also had brighter colors and looked a bit out of place in the darker setting, so I changed the lighting back to be a bit brighter and I think it's the right choice.
I am decently happy with the final map, but the noise based placement didn't turn out as great as I had hoped. The main reason why I implemented the noise based placements was to create more distinct sections on the map, e.g. denser forests vs. rocky areas with only smaller plants, and I feel that most of the areas on the map are still looking quite similar. I think the main problem was that I chose a bad noise, but there may be other improvements that could be done too.
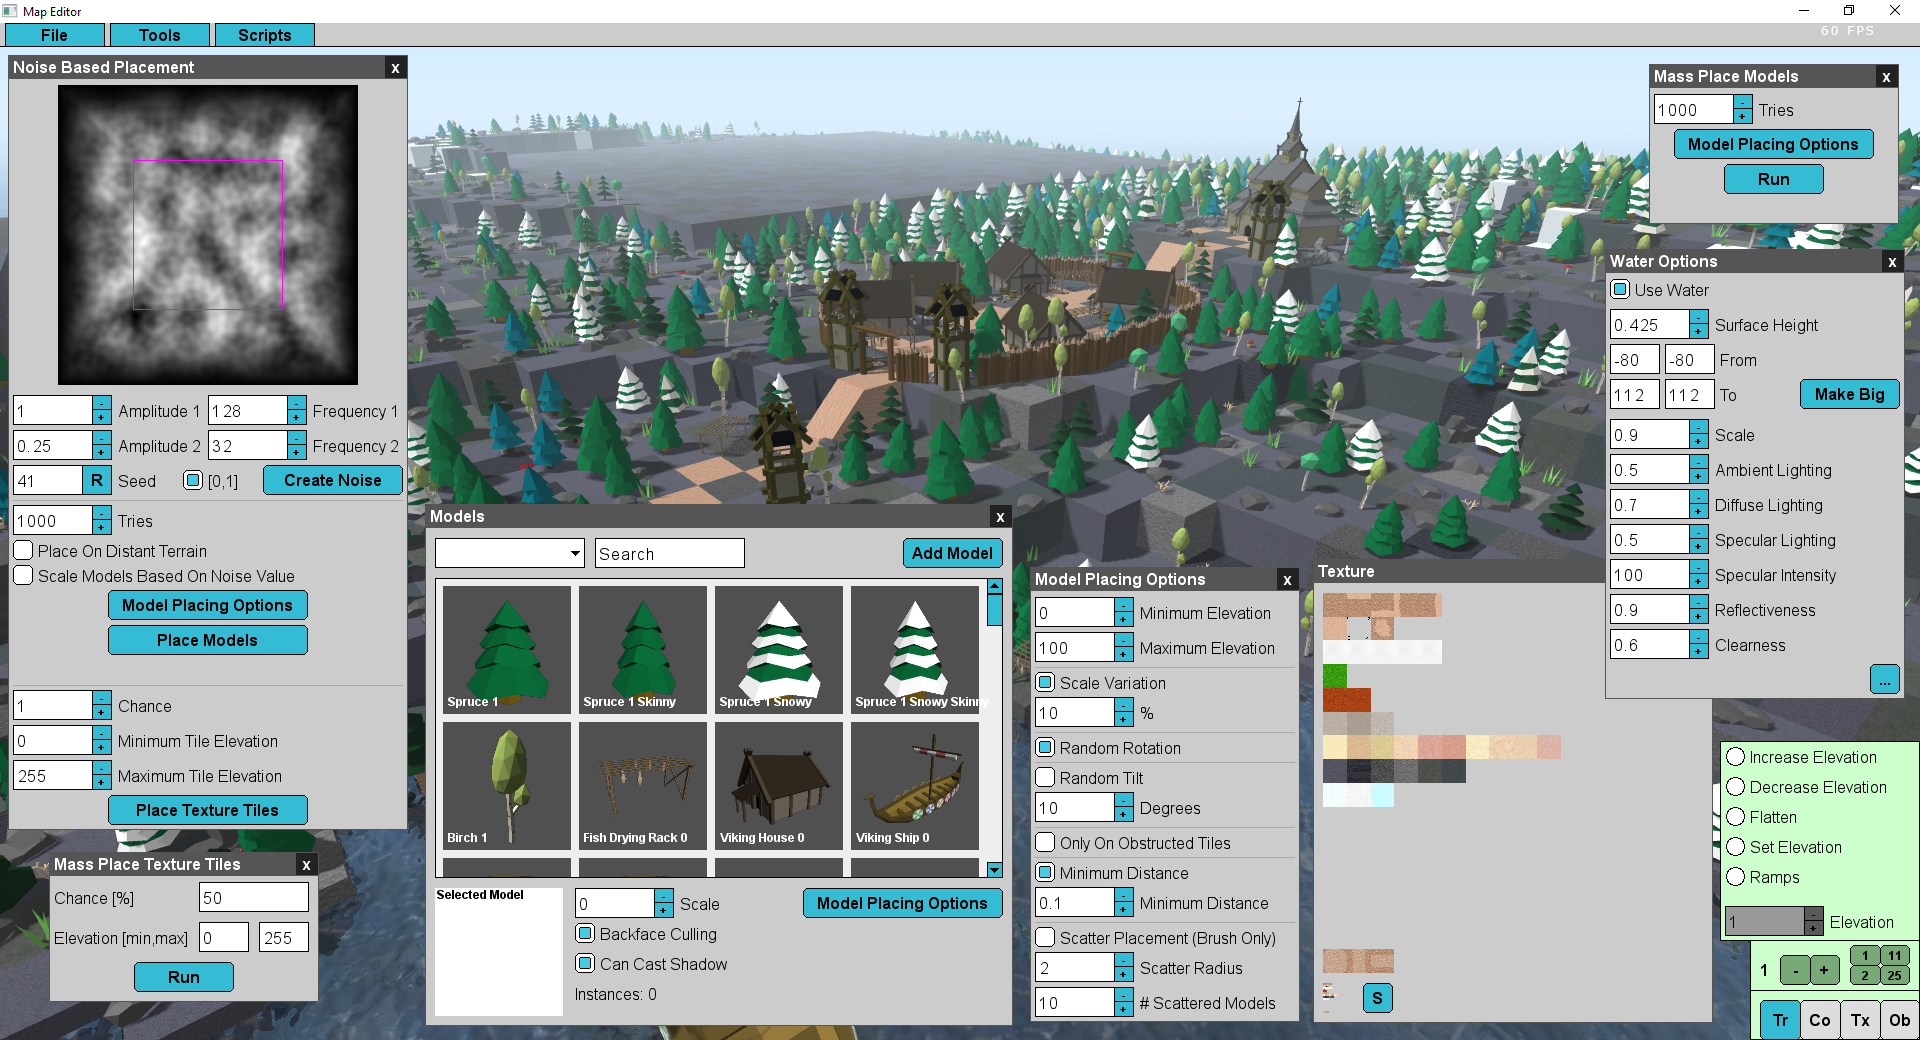
A few of the editor features used during the creation of the map:
Editor Problems
One thing to mention is that my editor crashed twice while working on the map, which made me lose a little bit of progress each time. There are two types of crashes in C++: bad ones and stupid ones. Bad crashes happen out of nowhere and you have no idea what the problem was, where it occured and how to fix it. These are mostly memory leaks or corruptions and take forever to find and fix. The second type of crashes are stupid ones, where you know exactly what the problem was. These happen mostly because you forgot to add a simple error check or overlooked an obvious problem, and everytime they occour you feel like "Damn, I'm stupid", hence the name. Luckily, or unluckily depending on your philosophy, both crashes were stupid ones.
The first crash was a plain old user error. I wanted to open another asset file while I was thinking about something else and used the normal load button instead of the load asset file button and the editor got confused and crashed. I simply forgot to add an error check for this.
The second crash wasn't even a crash, it was a lot more stupid than that. At some point I had added a bit of code to move a window up in its entirety when it would be out of view after a framebuffer size change. However, when I implemented that, I didn't have tall windows in mind, because I didn't have any at that time. But recently I added the noise based placement window and it's about 800px tall, while the default framebuffer size is only 720px. And I must have resized the framebuffer at some point, which had moved the window up. So now I had a big window with its titlebar about 80px above the framebuffers top edge and I could neither move it nor close it. And unfortunately, it was over the menubar, where the save button is located. So I sat there with the editor open and like 10 minutes worth of unsaved progress and absolutely no way of saving it for about five minutes in disbelief before I had to close my editor without saving. In hindsight I really should have implemented saving with CTRL+S at some point. After feeling stupid for a while, I did add CTRL+S saving and also added another piece of code so the window titlebar can never be above the top edge.
A complete timelapse of the creation of the map:
Miscellaneous
- Bounces, multi attack and equipment slots are now listed as effects in the building hover, e.g. Multi Attack 3, Bounce 2
- Fixed a bug where a trap with self destruction was able to keep attacking for a short time while already being destroyed
- When building a trap the range indicator is no longer shown
- Added bouncing for normal projectiles and friendly entities
- Added number of bounces and bounce range to the web tool
- Added multi attack and bounce support for the line towers, which was actually quite tricky to implement
- Made a wooden palisade, a wooden palisade gate, a cobblestone wall, a viking shield and a sword model in Blender for the new viking map
- Fixed a bug in the editor, where I had forgotten to add depth testing for the color picking so it was possible to click through models under some conditions
- Added the ability to hide the ui in the editor
- Added the ability to play a camera path with the space bar
by Christian - 28.05.2020 - 18:00